2. How to Create a Capstone Trello Board
Overview
In this chapter, we’ll guide you through creating a board in trello for organizing a project. Once you have created an account and logged into Trello, you can create a Trello Board through selecting the tab “Create” at the top of the screen. From here you can select one of three options to create the board: Create board, Start with a template and Create Workspace. Once the board is created, the next step is to add cards and review the main settings.
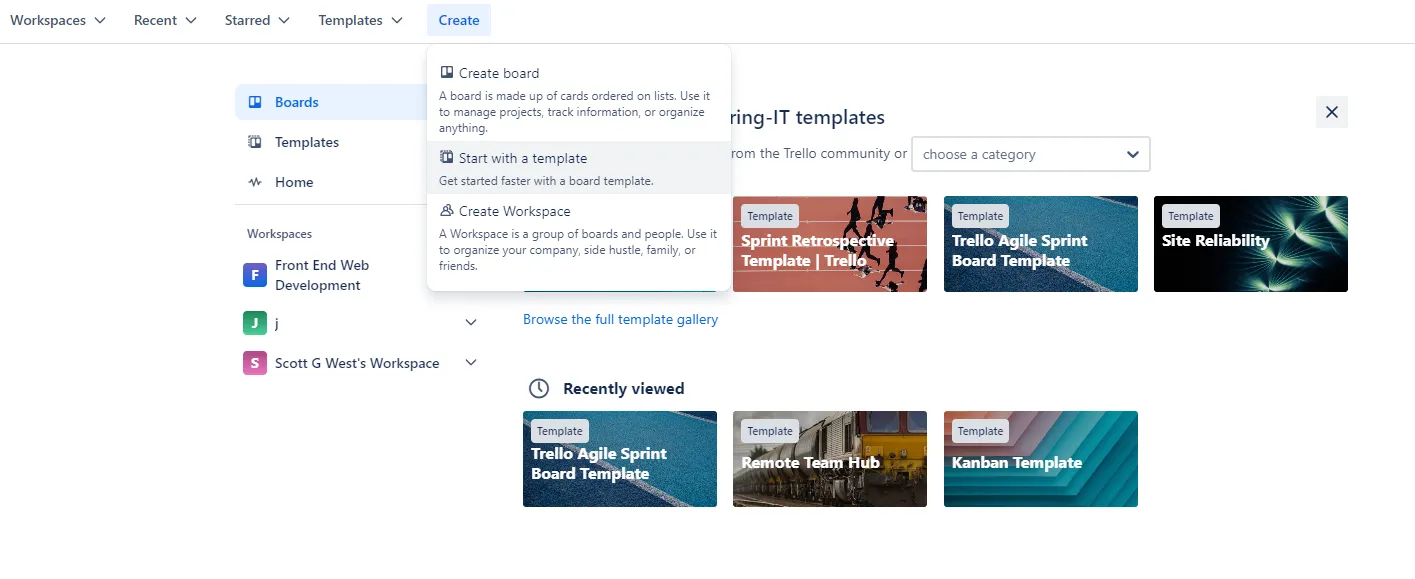
Figure 1: Create a Trello Board
Watch our Video Tutorial
Watch our video tutorial to learn how to create a project board within Trello and customise the main settings.
Link: https://youtu.be/4Qvctrpmveg
Steps for Creating a Board
- Log into your Trello account.
- Click the Create button in the top right corner.
- Choose either: Create new board, Start with a template, or Create Workspace.
- Select a Background, Name your board, Choose a Workspace, and set the visibility.
- Click “Create” to get started.
Board Creation Options
Now you know the steps to create your first Trello board, let’s further explore the three board creation options.
Start with a Template
When creating a new Board as a capstone student, a good place to start is to peruse the existing Trello Board Templates to try and find a suitable one. Two good categories to peruse for selecting an ideal template are: Engineering and Project Management. Note that when creating a template, a recommendation is to use the cards as a guide and set the visibility to Workspace.
For working in a Capstone company there are two Trello Boards that are good general templates. One is the Trello Agile Sprint Board Template which is divided into four lists being: ‘Backlog’, ‘Sprint Backlog’, ‘In Progress’ and ‘Sprint – Complete’. Another relevant option for Capstone is the Kanban template organizing tasks into the lists: ‘Backlog’, ‘Design’, ‘To Do’, ‘Doing’, ‘Code Review’, ‘Testing’ and ‘Done’. However, there are many other project templates tailored to a variety of tasks so ensure you explore what is on offer.
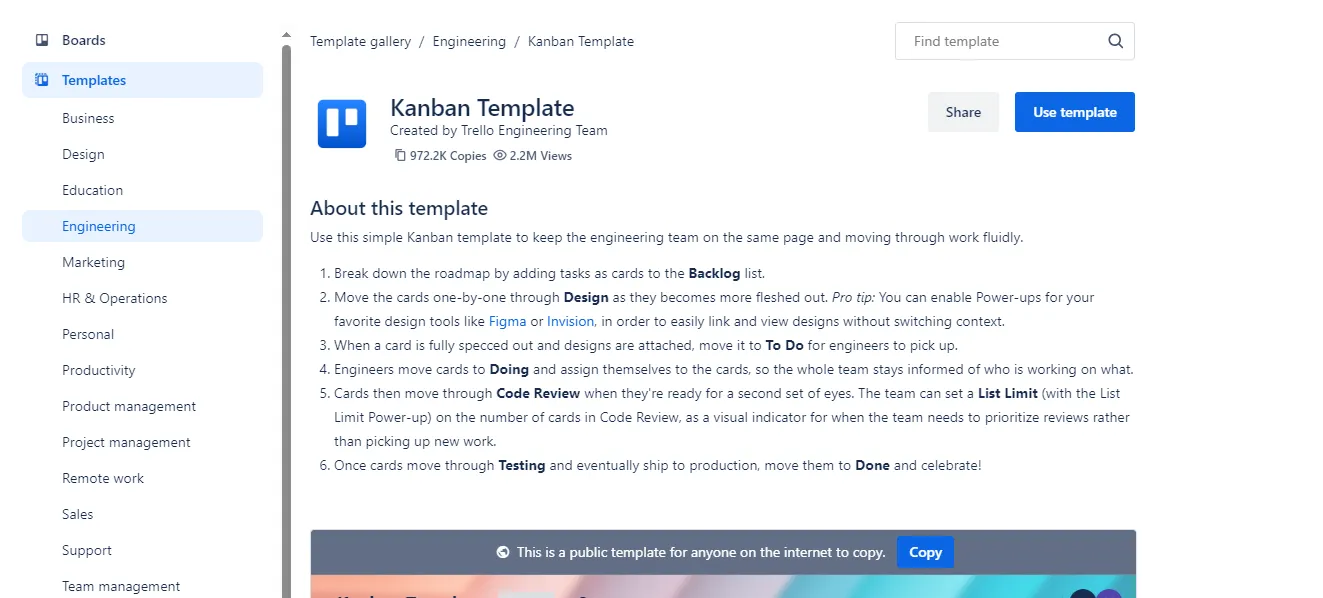
Figure 2: Selecting the Kanban Template
Create a Board from Scratch
Creating a Trello Board from Scratch means creating a brand-new board with no template features such as lists, cards or functionality. Instead, any organisational features must be written. This can be a good option if none of the template Trello Boards are relevant to the new project, or you cannot decide which template to use. Through this option a team member can customise the board to their unique project, team members and circumstances. There is also less template information to go through.
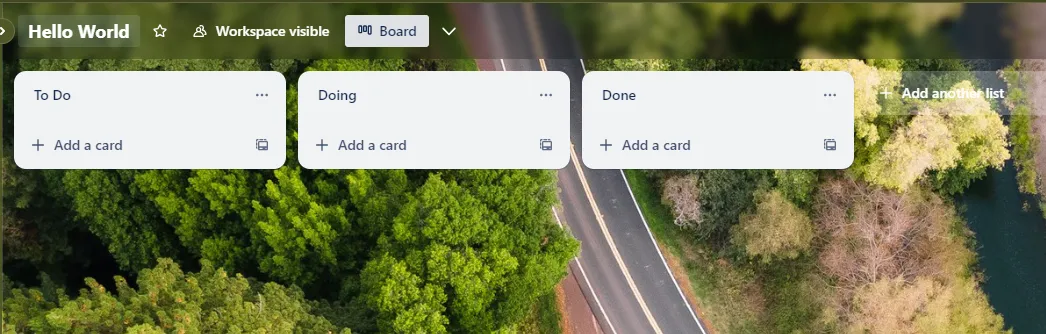
Figure 3: Creating a Board from Scratch
Create a Workspace
A workspace is a group of Trello Boards that can be collectively managed together. This option has merit if you have multiple new projects within the company to run or would like to start a new company from scratch. If you are pursuing this option there are a few aspects to note. The workspace name should be either the new company name or a name representing the projects. The workspace type should be “Engineering-IT”, and the workspace description should be a short-written summary encapsulating the company mission and projects.
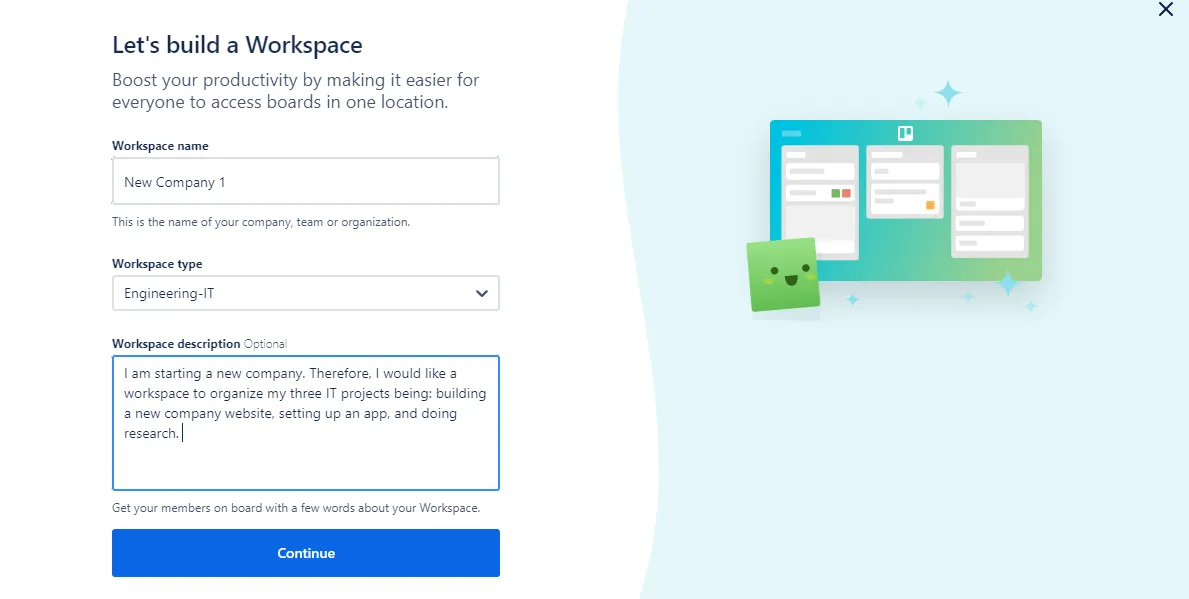
Figure 4: Create a Workspace
Setting Up the Board
Creating Project Cards
Adding Cards: Click “Add a card” at the bottom of any list to add new tasks or items.
Once you have selected a template it is a good idea to add the project tasks and ideas as cards into the backlog list. This can be done through selecting Add a card. When commencing a new project, it is recommended to add all the proposed tasks as cards within a list called Proposed Tasks to be discussed in the team meeting. If the team decides to continue with certain tasks, the card can be moved to the Backlog list for allocation and actioning.
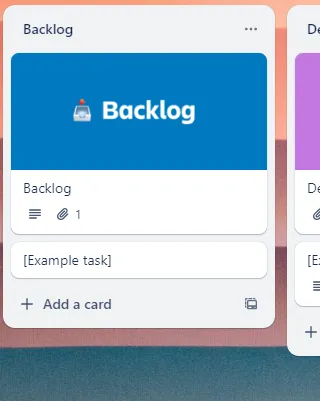
Figure 5: Creating new Project Cards
Main Settings
Once the board has been created with important project cards a good next step is to review the board settings. If you click the three dots on the right-hand side, then settings you can organise the workspace name and permissions.
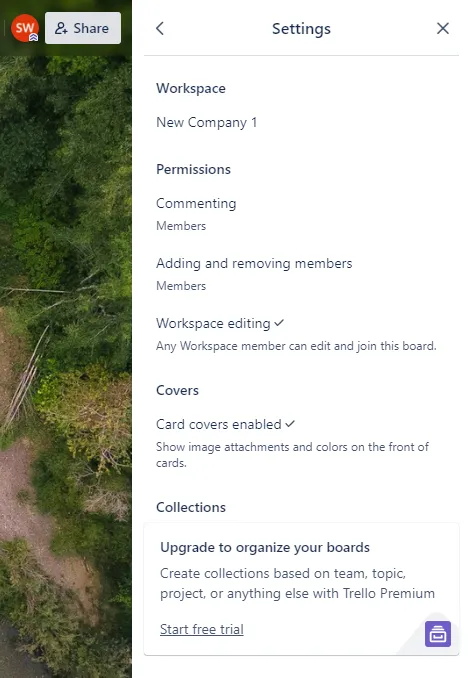
Figure 7: Important Features
Further, the top left-hand side of the page allows you to change the board name, visibility and star for importance. Clicking into the board name allows you to amend. Starring the board gives the board prominence which is a good idea for boards currently being worked on. Visibility can also be amended from here in line with the privacy priorities of the project.
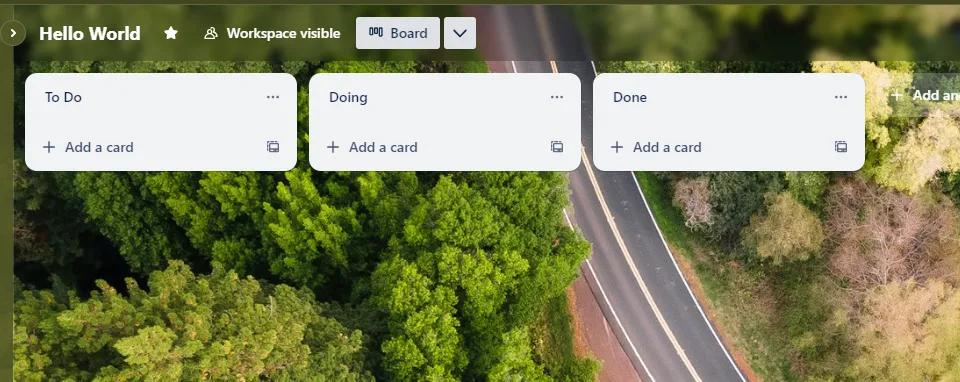
Figure 8: Board Settings
Conclusion
Creating a board in Trello is the first step towards project management success. With your board set up, you’re ready to start working on and organising the project. Great work!